by Greg Hackenberg
So, after a long hiatus, I reappear with a quick (like I can write anything described as ‘quick’) piece for the equipment corner on a recent hardware upgrade I made…on the cheap. Yes, cheap, or as the Scots would say ‘frugal’. I get the Scotts blood on my Mother’s side so I am always looking to save a buck, and a little work never put me off. I’ll have the assembled device at this month’s meeting for viewing, so take this as the documentation.
As, my 8+ year old valve on the Keggel was looking a bit…worn, and I’d had a few ideas to improve my process, so it was a good time to refit. What I wanted was a whirlpool. After using the wonderful club equipment and seeing how well a good whirlpool worked to remove hops, trub, and other assorted gunk from the wort, I was hooked (Oxford comma, back there, big fan of them), but I needed a pump. Now, I do not have a big brew tower super-system, etc. Gravity works pretty well for me, so I was not looking to move mass quantities of liquid around. But most of the available pumps do just that, like big hulking quantities. Like, how fast can you drain a pool, quantities. Not to mention they run well over a Franklin along with his buddy Hamilton.
Now, if you’re a betting person, you would probably take the odds that this is going to be about a cheap pump system cobbled together out of parts, and you’d be right. That’s what I did. After perusing a ridiculously long thread at homebrewtalk.com, links, and a few ebay searches, I had a plan. Technical note: the word format will include hotlinks to all the parts, but I will list the full links at the end.
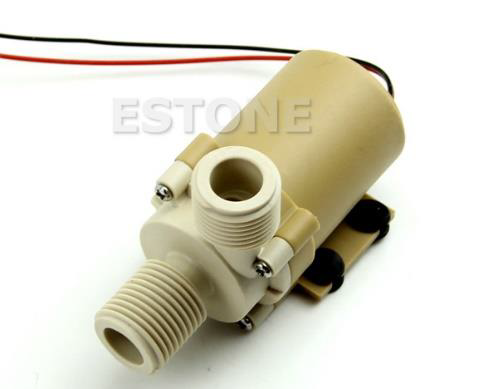
First, we have to find a pump, and there is a likely candidate in this DC solar water heater pump and I recommend the 24v model, 12v is also available and works just fine. If you have concerns, please wade on in to the 124+ pages of the thread where all manner of concerns over food grade vrs. potable water vrs. Chinese manufacturing and/or the new world order and the call of Cthulhu. Okay, I made up the Cthulhu bit, but, bottom line, these are rated for potable hot water and the plastic type is pretty much okay with hot wort, and while there may be some quality control issues…the damn things are under $17, you can always buy another.
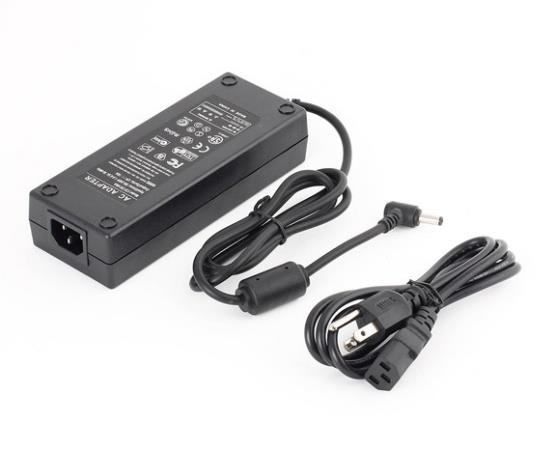
Next, there is that DC power bit. You can’t just plug them in, you need a transformer/power supply. The issue here is amperage, amps. You want at least 1 amp, 2 preferable, but more is better. A 3-5 amp supply and you can run multiples of these with ease with little cost difference. I went through that box of old transformers I have (frugal, Scots blood, remember?) and nothing close to even 1 amp, you may have better luck. I ended up going with this power supply in a 3 amp version. There are a LOT of other options, but make sure your voltage 12v or 24v matches up.

Here, at this point you can wire the pump up directly to the power supply and off you go. But an on/off switch sure would be nice, and the beauty of DC is you can easily control the speed. You can find the parts separately or combined. I opted for the Cadillac of cheap chinese crap and used this speed control with an on/off button, knob, and digital speed display (Oxford comma, again). As with most stuff these day, there are lots of other options, from simple in-line on/off switches, LED buttons, and simpler speed controls. But again, make sure your voltage 12v or 24v matches up.
Now, if you went with a speed control, and other bits, you want to house them in something. Also these pumps are tiny and the weight of a liquid filled hose would send them tumbling. So they could use a little support to keep them level. I went with a simple gray outdoor electrical junction box from Home Despot, which is extremely tough and seals with a gasket. It took a bit of dremel work and drilling to get the parts in, as the plastic is too thick for the knobs and display to mount. If you went with a metal, or thin plastic electronic “project” box it should be easier. Lastly, this power supply features a standard male plug end. You can clip it off directly wire it to your system, but I added a female socket (shown in the speed control photo) in the side of the box. Be sure to get the correct size, in my case it was 5.5mm x 2.1mm which is one of the most common. Most have three prongs, you only need the + and –, they are indicated in the photo.

Then, you need to wire it up…pretty simple with DC, really, red is your positive. The red positive carried power to the speed control via the socket and to the pump. The Black negative carries it back to the power supply. This particular control had clear + and – screw point connections for the power in and pump out, indicated. Other than stripping the wires, nothing too hard. But I did solder the wires to the socket. Now here is the complete build with cam lock fittings. Works like a charm. Thing move five gallons in less than a minute and a half, and set a nice whirlpool.
*This title herein refers to the jazz-fusion tinged track by Jeff Beck on the 1980 album Blow by Blow, for good measure it appears on the Risky Business soundtrack …I really need to name a beer Guido the Killer Pimp, but what would it be?
Full Links:
Thread: http://www.homebrewtalk.com/showthread.php?t=375904&highlight=positive
The Pump: http://www.ebay.com/itm/361163382356?_trksid=p2057872.m2749.l2649&ssPageName=STRK%3AMEBIDX%3AIT
Power Supply: http://www.ebay.com/itm/321897393755?_trksid=p2057872.m2749.l2649&ssPageName=STRK%3AMEBIDX%3AIT
Controllers: http://www.ebay.com/itm/261678264066?_trksid=p2057872.m2749.l2649&ssPageName=STRK%3AMEBIDX%3AIT
http://www.ebay.com/itm/12V-24V-36V-Pulse-Width-PWM-DC-Motor-Speed-Regulator-Controller-Switch-3A-1pc-/281547042764?pt=LH_DefaultDomain_0&hash=item418d82efcc&afsrc=1&rmvSB=true
